| Adding Rotations Page 3 By David Goss |
| Tips | |
| Inside Customization | |
| How-to Download | |
| Downloading SimFreaks Icon System |
|
| Objects - Coding | |
|
Adding Rotations |
|
| Objects - Photoshop | |
| objects
overview alpha channels rugs |
|
| Objects - PSP | |
| Skins | |
| Default Recovery mesh vs skin changing head texture Hot Date skin naming Maxis Head Mesh List |
|
| Wallpaper | |
| How to Make Walls | |
| Tools for Download | |
| Default
Recovery Pack Simpose-ium SimShow Transmogrifier |
|
| Transmogrifier Group | |
| 18 | OK, that has the 4 rotations added for the large zoom. Now we just have to tell T'mog which images to use to create the smaller images. NOTE: If you export all zooms all channels then you would have each zoom looking like this first part with filenames. When you don't export the smaller zooms, T'mog makes note of which index to use with the proxy number. |
| 19 |
Go to the next section (was orgonally index 3) and change it to index 5. Again, it's proxy image is already set to the correct one. |
| 20 |
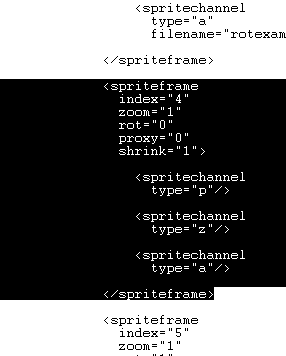
The beginning of the section is marked with the "<spriteframe" tag and the end is marked with the "</spriteframe>" tag. Be sure you copy and paste the entire section whenever you do this. T'mog WILL CRASH if one of the tags is missing! After you paste it change the index (in the section you just pasted) to 6. Now you will need to change the proxy to 2 so this will pick up the "se" image. |
| 21 | Copy and paste the index 5 section and paste it after the index 6 section. Change the new section to indes 7 and it's proxy to 3. |
| 22 | Using the origonal index 4 and 5 I create
the 4 sections (index 8,9,10,11) for the small zooms, using the same
method as above for the medium zoom (steps 19 - 21) Click here to see the complete xml. |
| 23 | save the xml and import your object back into t'mog. check each rotation and zoom to make sure they match up. If they don't you can go make the corrections in the xml then import and check again. |
| 24 | If you get any errors on the import, chack to make sure all the tags match up, beginning, end, and positioning. Also make sure you didn't skip section. I haven't had one yet to error where the problem wasn't a typo or something I had done. |
| 25 | Multi-tiled objects - you can do these pretty much the same way, there is multiple parts to each section(depending on how many tiles there are). Also before you attempt to do one of these, study how the <drawgroups> section is layed out(I would suggest first looking at a 2 tiled painting, then maybe a three tiled sofa). It is a little tricky at first because it combines each tile in each section. If you look at one you will see what I am talking about. As long as you are aware of that then you should be able to get it. On my first one I had went through and made all the changes to the drawgroups as I explained above (8,9,10,11,4,5,...) but when I got through, there were more drawgroup sections, but I was out of numbers hehe. |
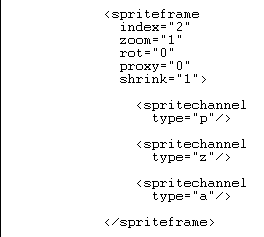
 OK next go down to what was origonally
index 2. This should be the first section that has a "proxy"
value. Change the index to "4". Since this is the first
medium zoom section, this is the "nw" image. The "nw" image
was defined in index 0 so proxy = "0" is correct. You don't
need to change it.
 Now I go back and copy the index 4 section and
paste it after the index 5 section.